
Applicant details
This section contains information about the applicants:
- Personal details
- Residential history (minimum of 3 years)
- ID details
- Employment history (minimum of 3 years)
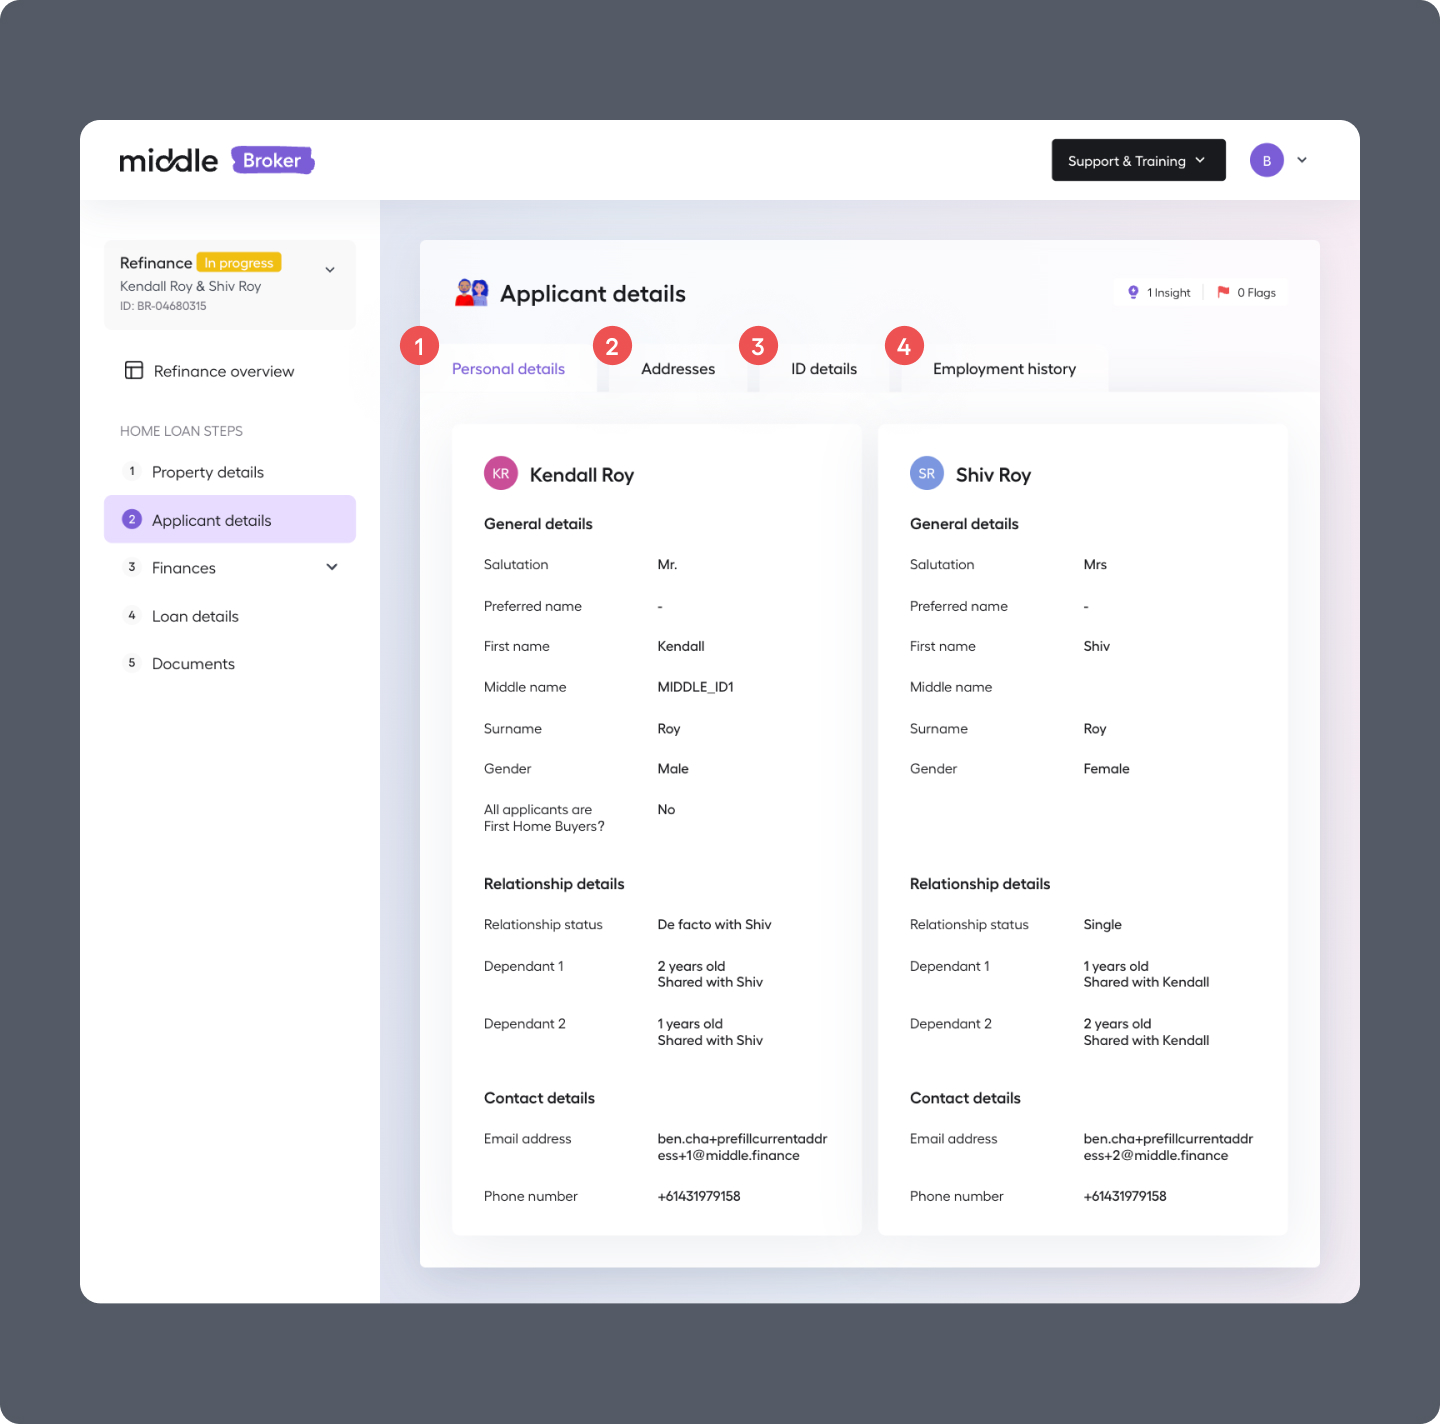
1. Personal details
General details:
- Preferred name
- First name
- Middle name
- Surname
- First Home Buyer indicator (this is only answered by the primary applicant)
Relationship details:
- Relationship status & with whom
- Number of dependants & their age
- Who they share their dependants with
Contact details:
- Email address
- Phone number
Edit email address
You can amend your client's email address if you entered it incorrectly. We'll send a new invite email to the new email address you enter. This can only be done whilst the Discovery Journey is in the 'Invite sent' status - you cannot amend the email address once your client starts the Discovery Journey.
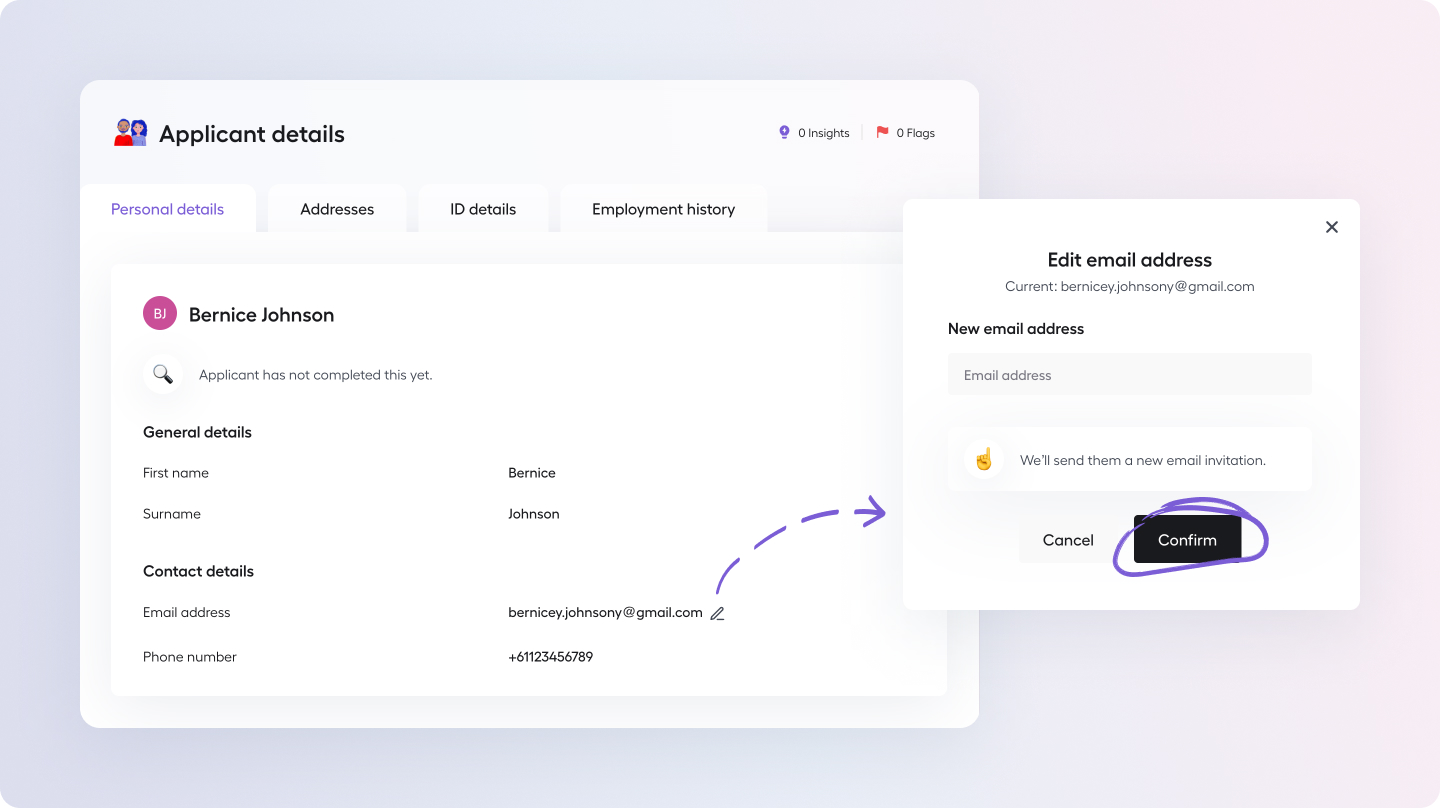
- Go to the Personal details tab of the Applicant details section inside a Discovery Journey
- Press the pencil icon (edit) next to your client's email address
- Type in the new email address and press 'Confirm'
- A new invitation email will be sent to your client
Whilst you can't re-send an invitation / Discovery Journey to the same email address, your clients can login directly by visiting: https://app.middle.finance/login?redirect=%2F
2. Addresses
Residential history of the applicants for a minimum of 3 years and their postal address.
3. ID details
- Full name (as shown on ID)
- Previous names (if any)
- Date of birth
- Residency status
- Driver Licence details
- FrankieOne verification result
FrankieOne ID verification / KYC result
ID verification / KYC successfully Verified
This means that FrankieOne could successfully verify your customer based on their Australian Driver Licence. If you requested an Equifax data enriched Discovery Journey, we'll then pull your client's Equifax Credit file.
ID verification / KYC Failed
This means that FrankieOne could not successfully verify your customers' identity.
This could be because either your client entered in their details incorrectly or our ID verification provider could not successfully verify your customers' identity against the government databases that have been checked.
Note - After 2 unsuccessful attempts, we will allow your customer to progress with their discovery journey with a failed ID verification.
In the scenario of a failed ID verification we recommend the broker undertake an in person ID verification check or attempt to verify via an alternate method.
Reset ID verification / KYC
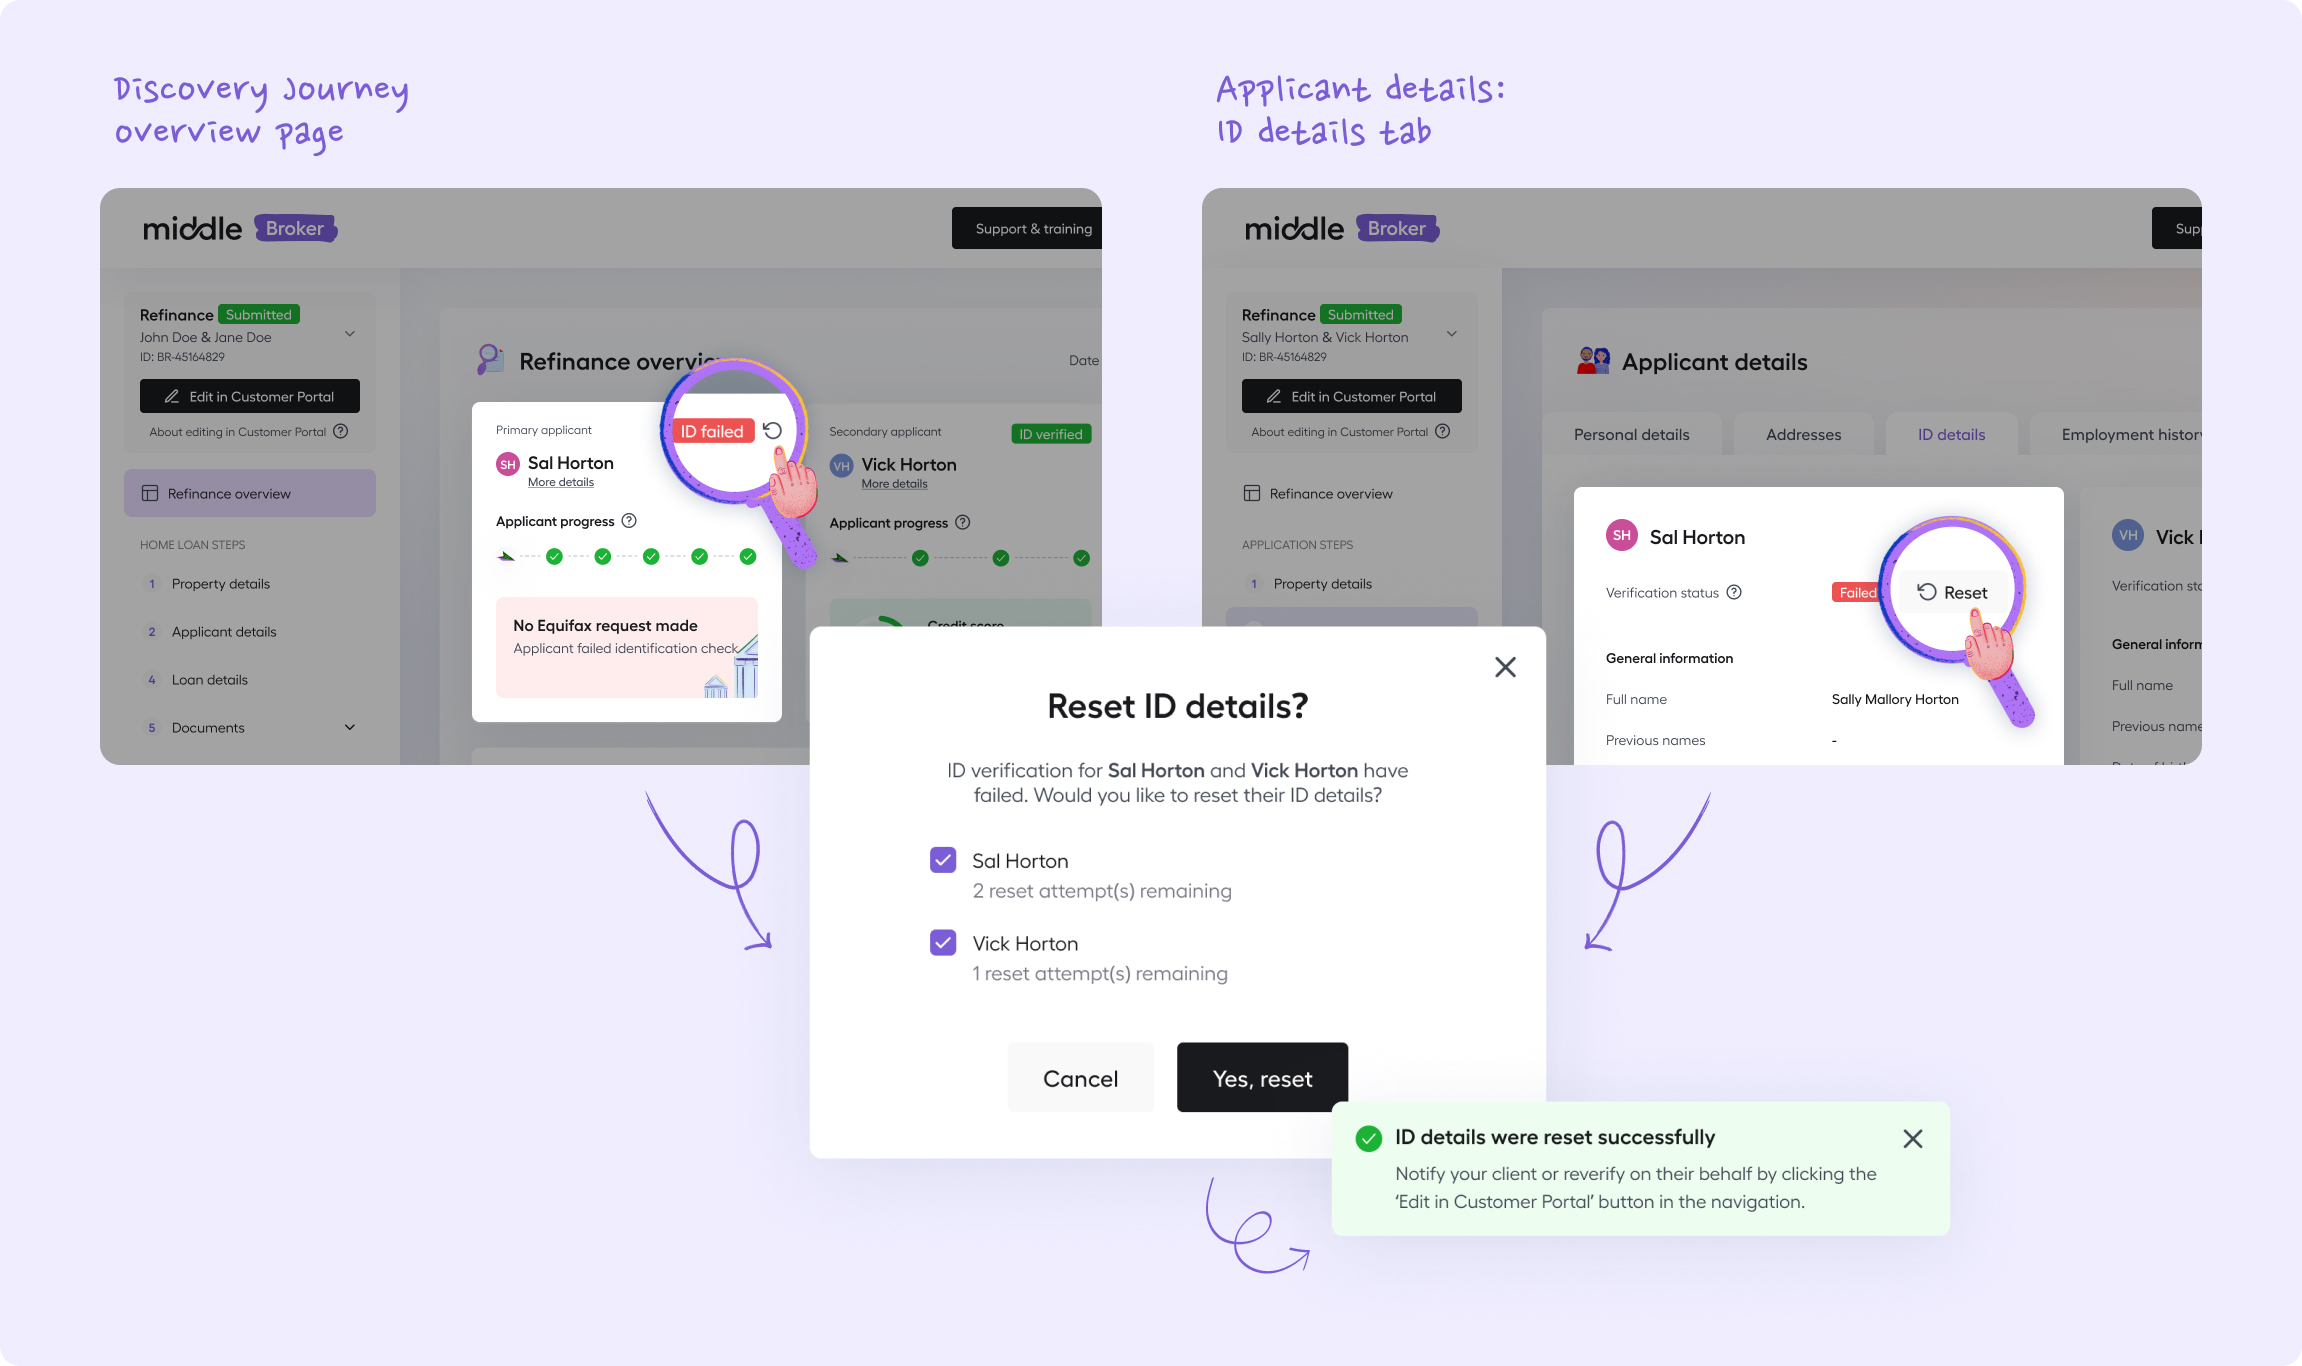
You can reset your client's ID verification if they've failed.
- From the Discovery Journey Overview screen:
- Locate the Applicant tile
- Use the 'Reset' icon button next to the 'ID failed' status
- Select which applicant's you'd like to reset and confirm by using the 'Yes, reset' button
- You'll see a 'Success' toast after this has been completed
- Tell your client to reattempt their ID verification, or if you already have their ID details handy, use the 'Edit in Customer Portal' button and re-provide their ID details yourself
- From the 'Applicant details' tab
- Navigate to the the 'ID details' tab
- On the Verification status row, next to the 'Failed' status use the 'Reset' button
- Select which applicant's you'd like to reset and confirm by using the 'Yes, reset' button
- You'll see a 'Success' toast after this has been completed
- Tell your client to reattempt their ID verification, or if you already have their ID details handy, use the 'Edit in Customer Portal' button and re-provide their ID details yourself
Things to note about ID verification reset
- You get two resets per applicant.
- You can only reset an ID verification if it has failed (red). You can't reset an ID verification that was successful (green).
- A successful ID verification is required for an Equifax report. For an updated report, send a new Discovery Journey. We don't reset successful ID verifications, so a new Equifax report won't be generated for an existing, successfully verified Discovery Journey.
4. Employment history
Employment history of the applicants for a minimum of 3 years.
Updated about 1 year ago