
📑 Documents and templates
Set up templates for your favourite documents to speed up the document request process. Customise the default document descriptions to your liking. Add your preferred bank statement collection tool.
Getting there
- Access the User menu
- Select 'Manage account'
- In the 'Manage account' space, select 'Documents & templates'
Creating a document template
Create a template so you can quickly load your favourite selections when requesting documents
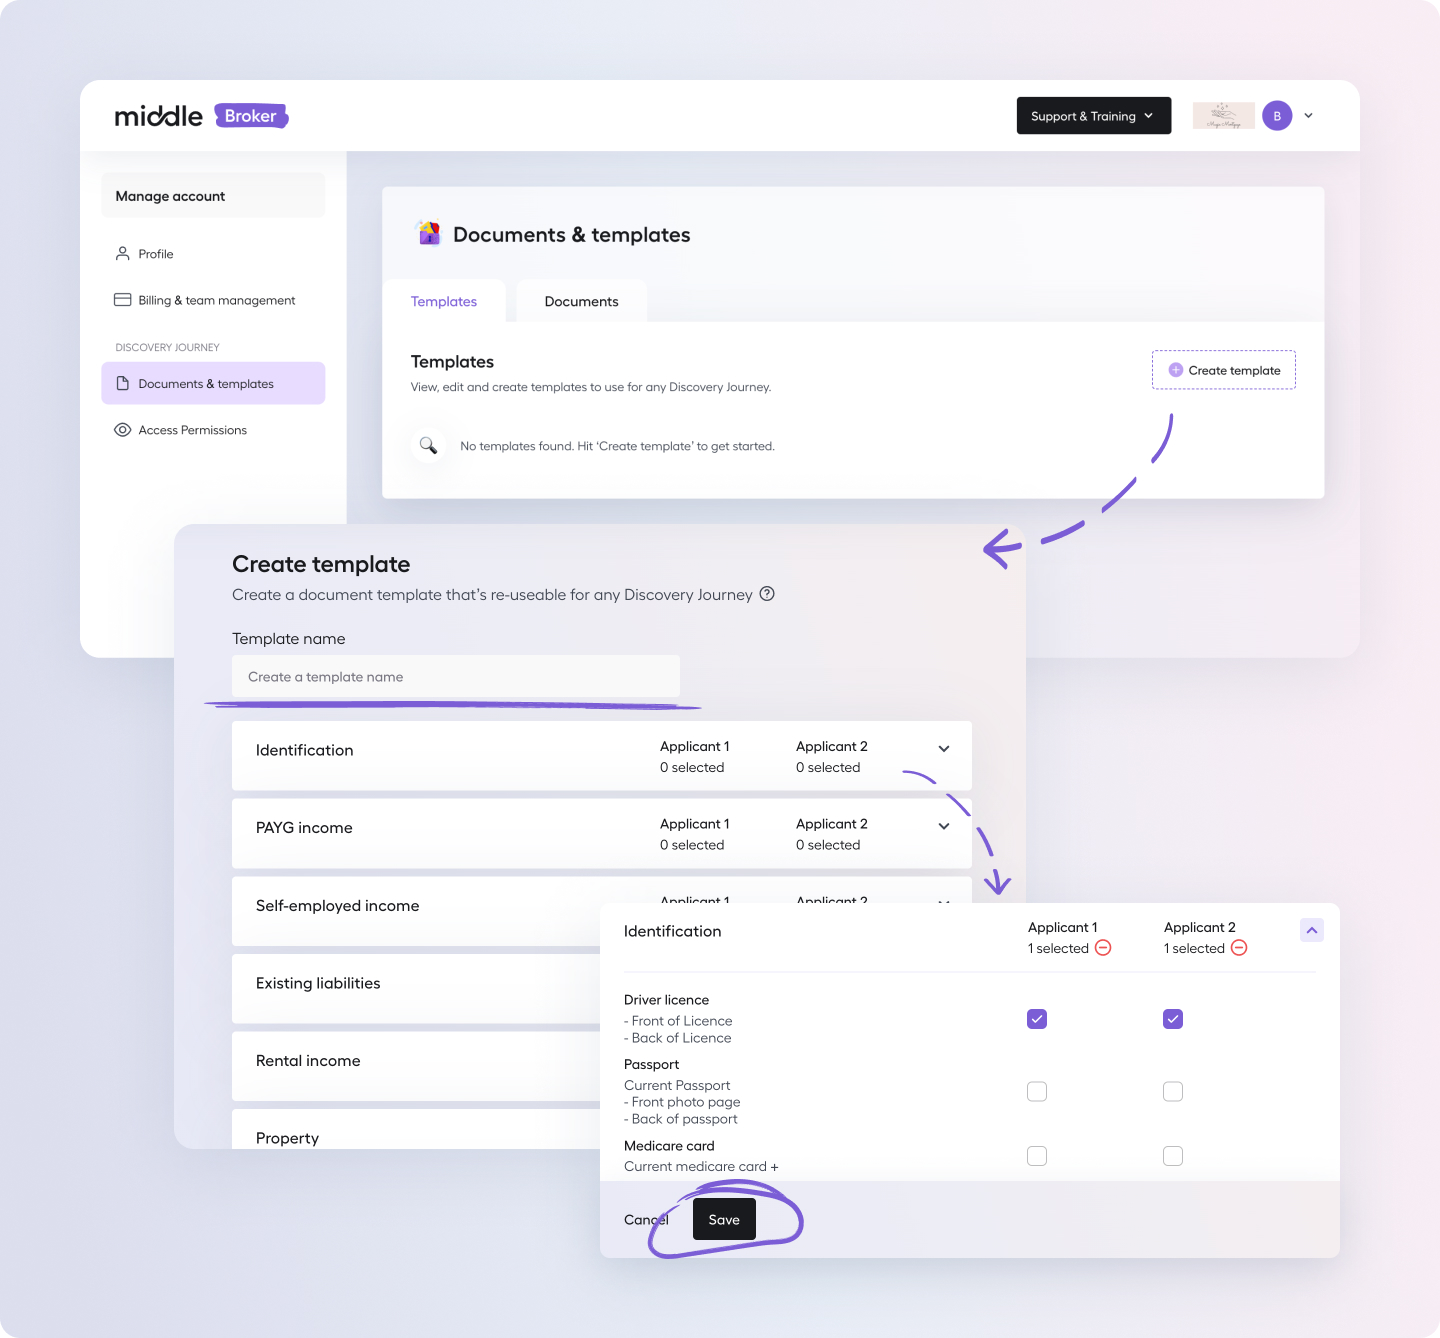
- In the User menu (top right hand side) press 'Documents & templates'
- Select 'Create template'
- Give your template a name
- Open the Document categories and select and documents you require
- Hit 'Save' once you're done!
🔥 Pro tips:
- Where you attempt to load a template which specifies documents for dual applicants in a sole applicant Discovery Journey, we'll load the selections made for Applicant 1 only.
- When requesting documents, you can quickly remove all documents within a category for each applicant by pressing the ⛔️ button.
Overriding default document descriptions
You can override the default description used for each document.
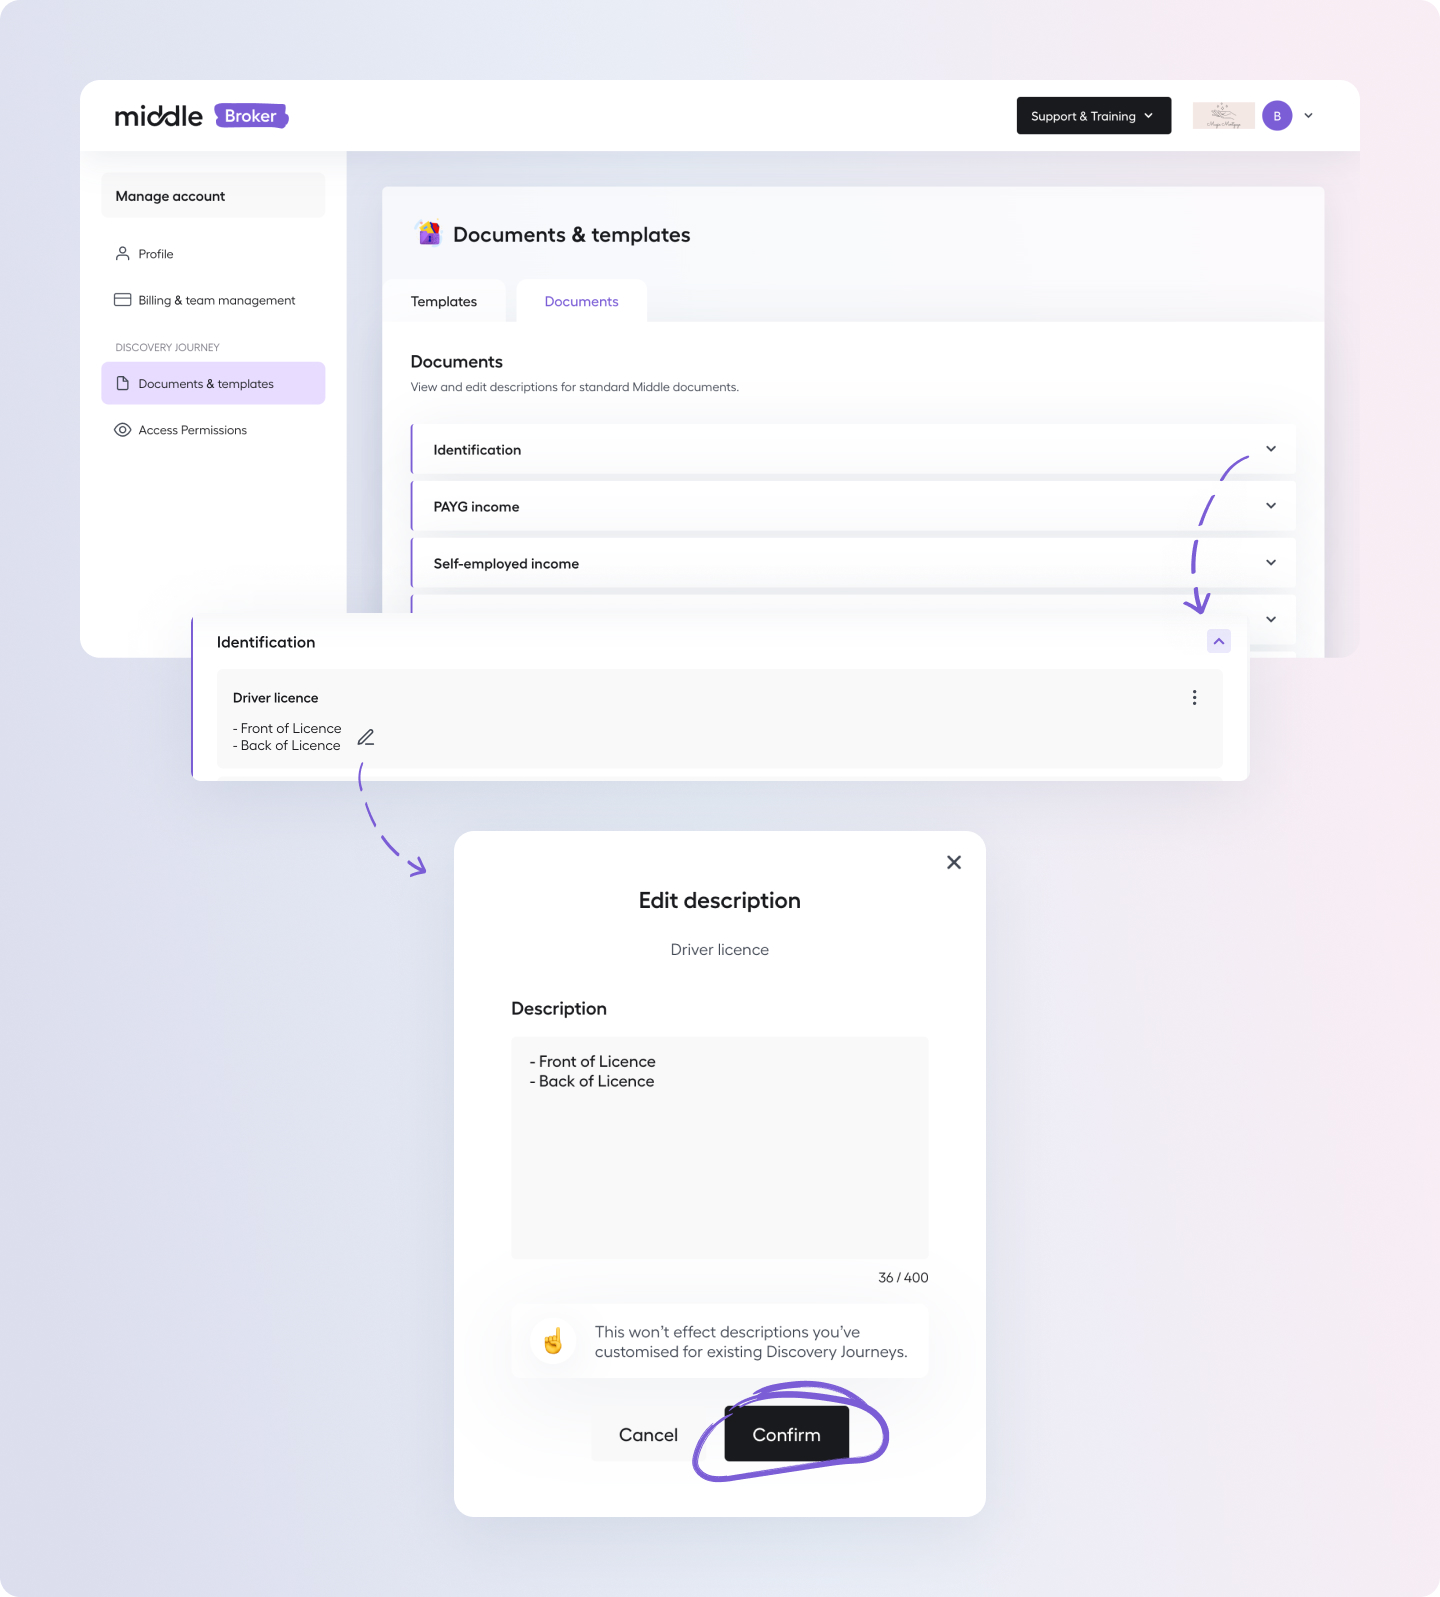
- Navigate to the Documents tab in the Documents & templates space
- Expand the document categories and find a document you'd like to override the default description for
- Press the the pencil icon (edit) to open the Edit description modal
- Amend the description and press Confirm once done
Now whenever you're in a Discovery Journey, you'll now see that description used for that document.
When completing the 'Select document' flow inside a Discovery Journey, editing the description here will only affect that Discovery Journey instance, so you can tailor it specifically for that client.
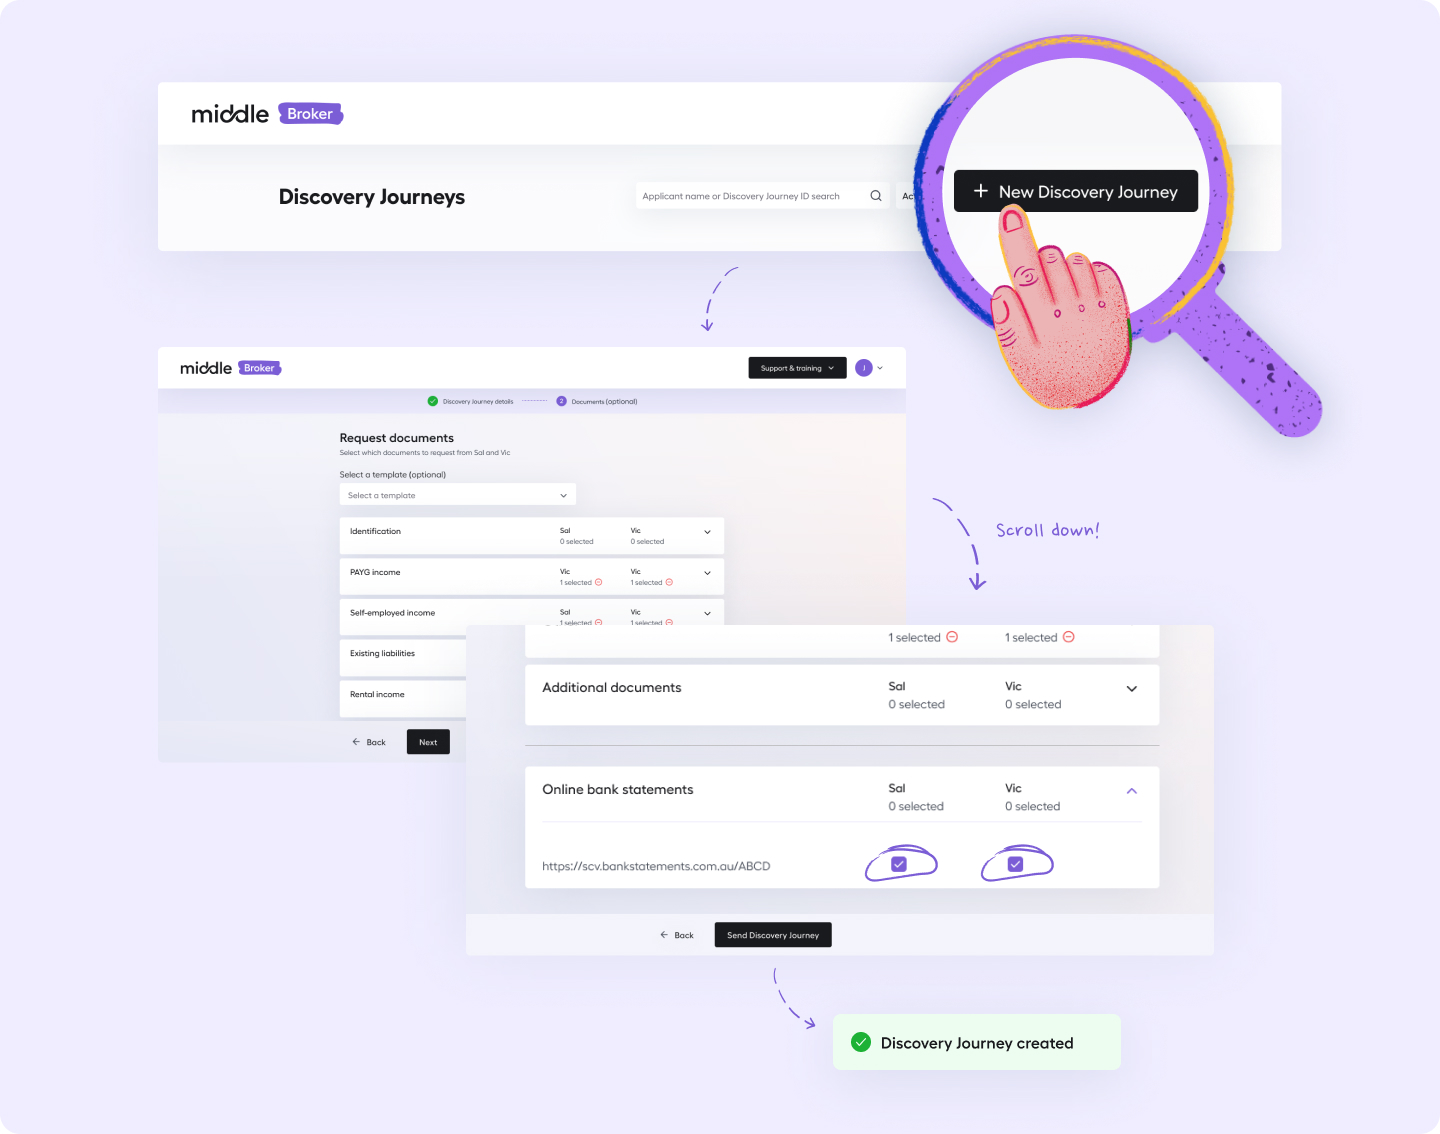
Online bank statements
With Open Banking you will receive bank statements automatically in Middle if your client connects their financial accounts. This is our recommended approach and means that using external bank statement collection URLs isn't necessary.
🇳🇿 Not available in NZ
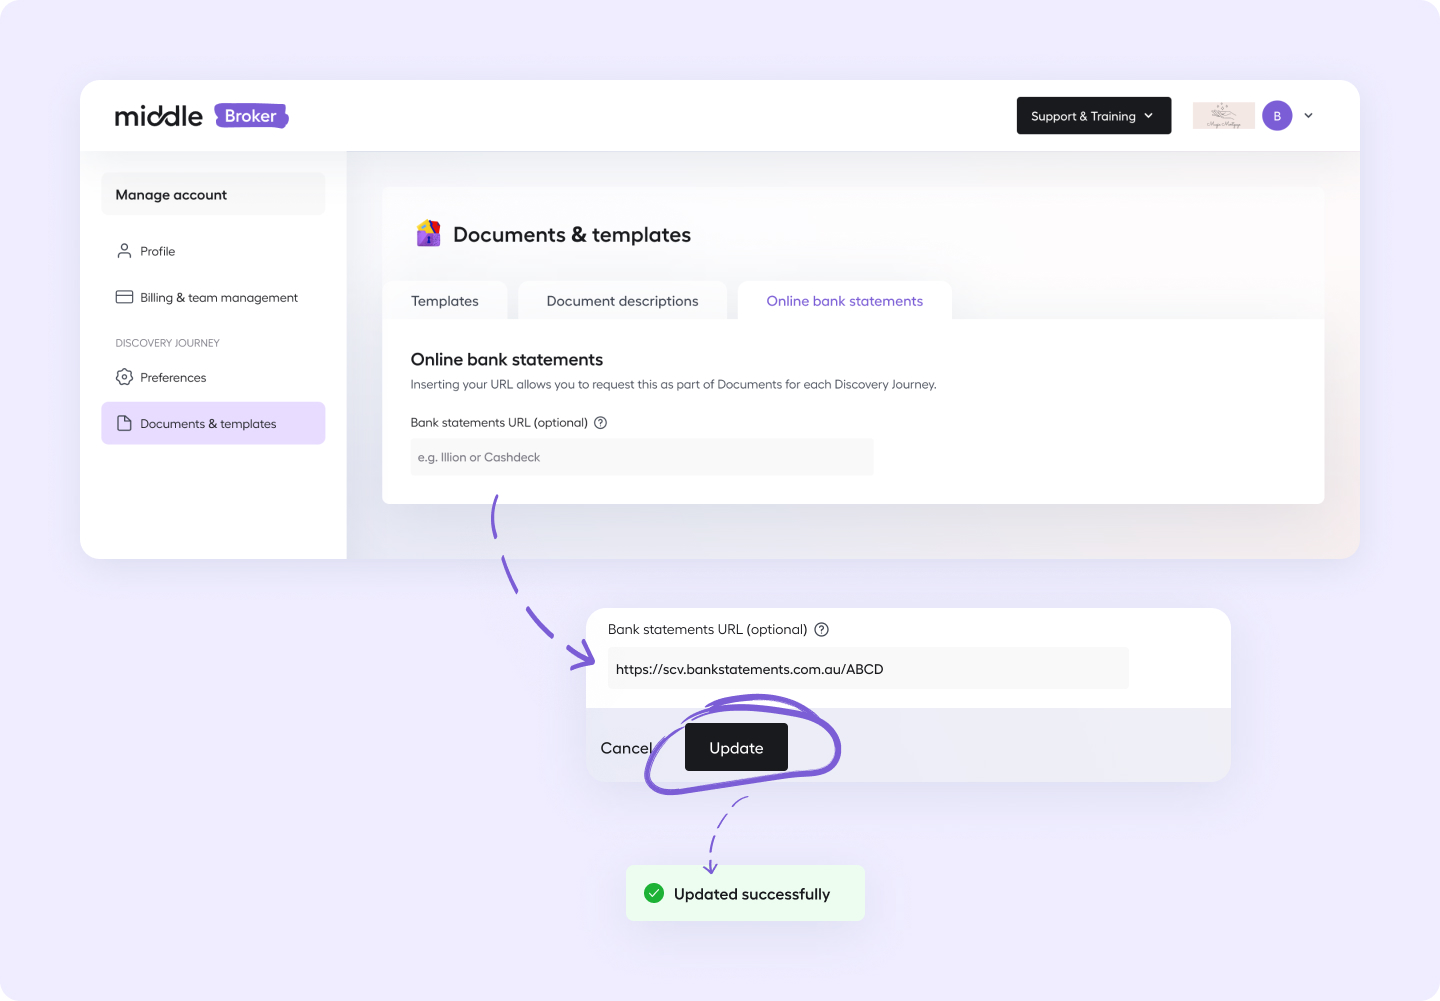
If you already use a service such as Illion or Cashdeck, you can toggle on an additional step that directs your client to your personal bank statement collection URL so that they complete this prior to the Upload documents step in Middle.
Adding your bank statement collection URL
- Go to 'Manage account'
- Go to 'Documents & templates'
- In the 'Online bank statements' tab, insert your URL and 'Update' to finalise
- You can now request this from clients in any 'In progress' Discovery Journey, or when you create a new one in Middle
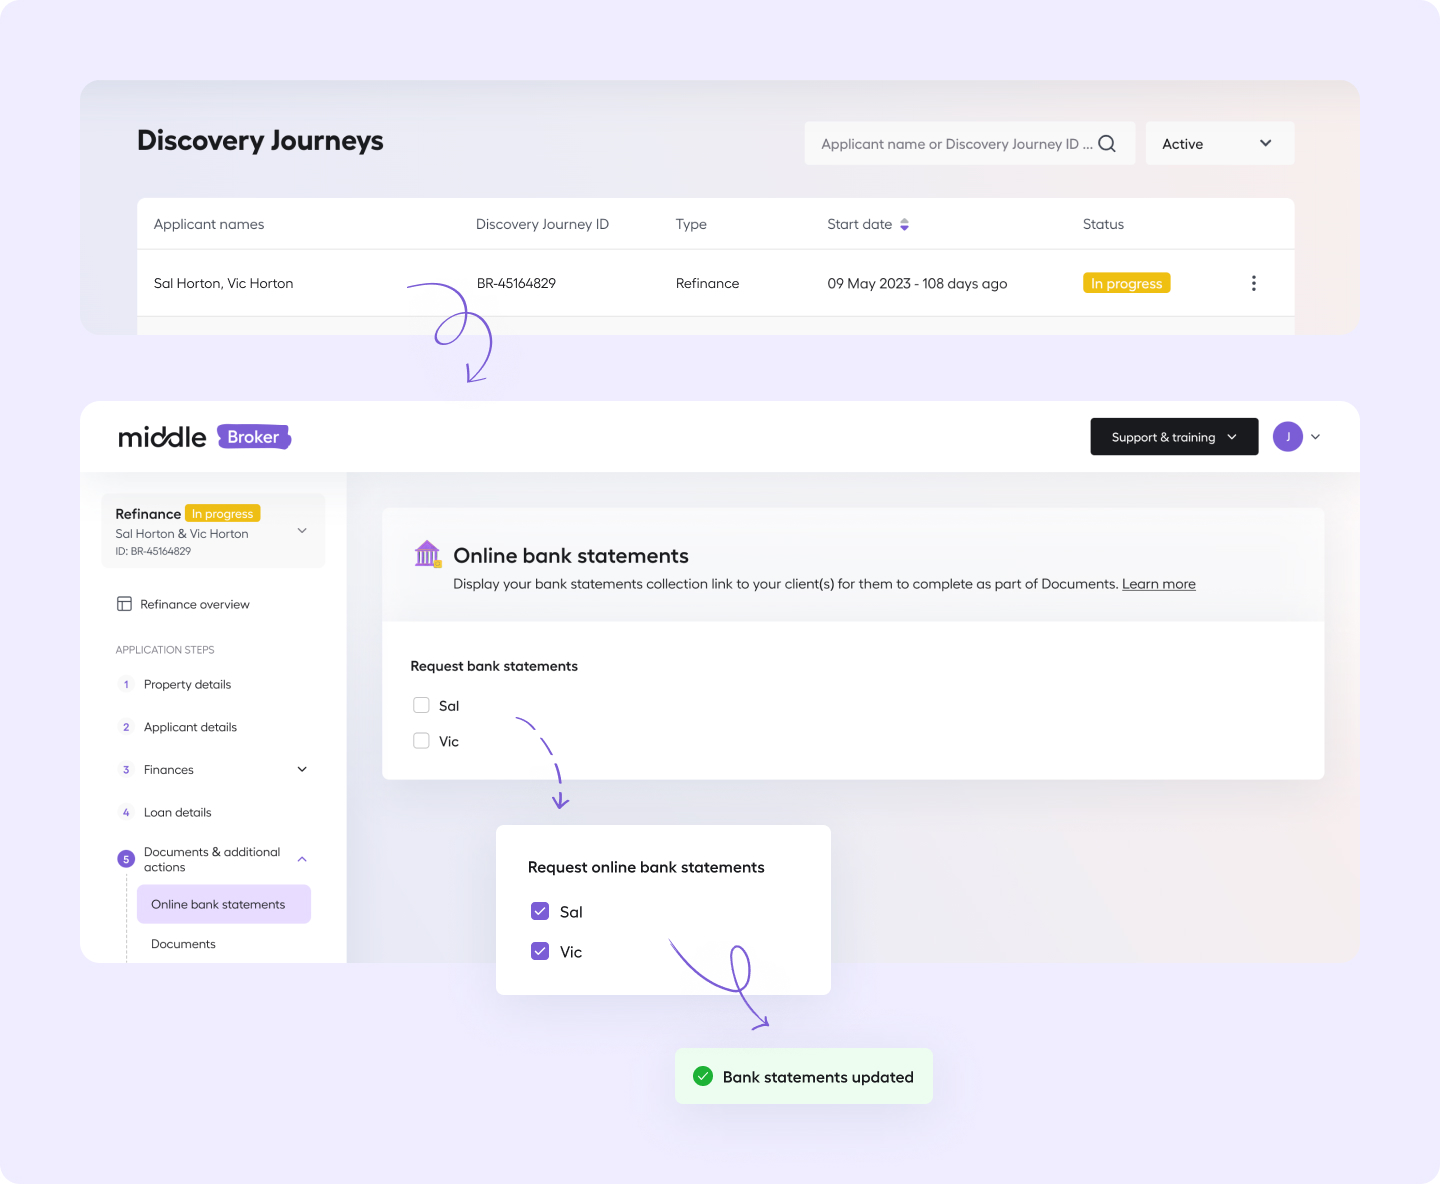
Displaying your bank statement collection URL to clients
In progress (active) Discovery Journeys
Once you've added your bank statement collection URL in 'Manage account':
- Navigate to any 'In progress' Discovery Journey
- Go to 'Documents & additional actions' step
- Go to 'Online bank statements' sub step
- Check on for the client(s) you'd like to show your URL to
Create a new Discovery Journey
In the 'View all' Discovery Journeys page:
- Click on the 'Create' button
- Fill out the appropriate details and proceed to the next step...
- In the 'Request documents' step, underneath all the documents you can request there'll be an 'Online bank statements' card that you can expand open, and toggle on / off which applicant(s) you'd like to show this step to
- Once ready, send your Discovery Journey!
What happens if I remove my Online bank statements URL?
If you remove your URL from 'Manage account', it will automatically hide this step for any 'In progress' Discovery Journeys. You can toggle it back one once you re-add your URL.
How does this work for assistants?
Your assistant will be able to request this from your clients just as you would (creating a DJ or toggling on for any 'In progress' ones) but you must have provided the collection URL yourself in 'Manage account' - your assistant cannot paste your URL for you.